Summer Corn Salad

corn & basil salad

Tastes like summer

I love most vegetables…corn is not one of them! I think it’s over used, always over cooked (but that’s a subject for a whole other post!) and makes a mess! However, this corn salad is a staple when we bbq, attend a picnic or just want a break from the standard summer pasta salads – it’s my go-to summer salad recipe and I just love it! In recognition of this Labor Day weekend and all the Backyard BBQ’s and boating trips we will all be enjoying, I wanted to share this simple, delicious recipe with you! It’s sure to hit the spot!

The Recipe

Corn & Basil Salad

Corn and grape tomatoes are tossed with an apple cider vinaigrette and finished with lots of fresh basil – the perfect summer side dish. 
Prep Time15 minutes
Cook Time5 minutes
Total Time20 minutes
Course: Side Dish
Cuisine: American
Servings: 5

Ingredients

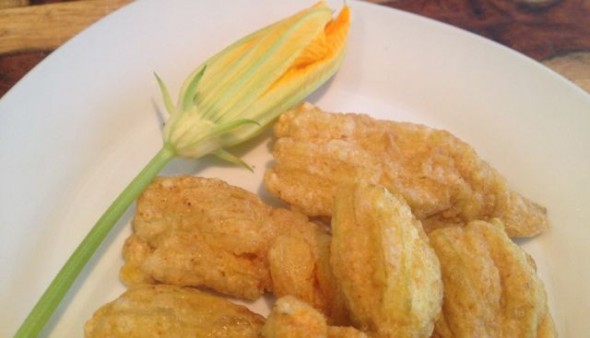
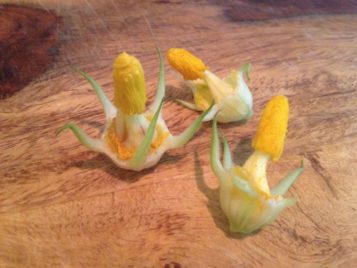
  • 5 ears of corn shucked clean
  • 3 tablespoons apple cider vinegar
  • 3 tablespoons olive oil
  • 1 teaspoon kosher salt
  • 1/2 teaspoon black pepper
  • 1/2 cup julienned fresh basil leaves
  • 1 cup halved grape tomatoes (optional)

Instructions

  • In a large pot of boiling salted water, cook the corn for 3 minutes until the starchiness is just gone. Drain and immerse it in ice water to stop the cooking and to set the color. When the corn is cool, cut the kernels off the cob, cutting close to the cob.
  • Mix together in small bowl vinegar, olive oil, salt, and pepper.
  • Gently combine kernels (and tomatoes, if using) with the vinaigrette.
  • Just before serving, toss in the fresh basil. Taste for seasonings and serve cold or at room temperature.

[/vc_column_text][/vc_column][/vc_row]

Fried Zucchini Flowers

fried zucchini flowers

My favorite fried summer treat!

Fried zucchini flowers are a special, Italian, seasonal treat and one of my all time favorite things to eat.

Zucchini plants produce large, beautiful flowers for the bees to come and pollinate which results in gorgeous zucchini fruit. But they have another wonderful purpose on this earth- for eating! You occasionally can find zucchini flowers available in a specialty food store but I have never seen them look fresh enough to purchase. I do order them at select restaurants at select times of year, but really, nothing compares to picking your own and frying them up within minutes of picking.

The Recipe

Fried Zucchini Flowers

Ingredients

  • Zucchini Flowers
  • Olive Oil
  • All Purpose Flour
  • 2 Eggs
  • Salt
  • Pepper
  • Cayenne pepper and/or paprika (optional)
  • Fleur de sel

Instructions

  • If you are picking your own zucchini flowers, pick the flowers when they are a healthy size, have not yet begun to wilt and are closed. Gently twist the bottom and pull out the insides of the flower. It should come out in one piece like in the picture here. 
  • Heat oil just to frying temperature. (Don’t let it smoke! It’s ready when it takes one minute to fry a cube of bread or you can see the oil start to swirl on it’s own.) 
  • In a medium size bowl, season the flour with kosher salt, fresh ground pepper, paprika and a dash of cayenne pepper.
  • Whisk 2 eggs in a separate bowl.
  • Dredge the flowers in the flour, shake off excess flour and dip in the egg.
  • Fry for about 2 minutes on one side and about 1 minute on the other side. (They fry very quickly so don’t walk away! Fry just long enough to cook off the egg and flour and produce a crispy flower.)
  • Drain on paper towel and season immediately with a sprinkle of flour del sel.  Enjoy hot.

Grow your lettuce in a window box

Home grown lettuce…what a treat! I grow mine in window boxes right on my deck. This allows me to have more control over insects and those pesky rabbits! It’s also quite convenient to walk right outside and trim a few leaves for a salad and pop right back into the kitchen!

Monster Madness!

A pile of assorted sandwich triangles with various fillings, topped with green and black olives, becomes a scene of monster madness!

Cooking for Kids!

I love a good theme party! Thankfully for me, I have a gaggle of nieces and nephews so the theme parties are never in short supply! When I found out my niece was having a Monster High party for her 7th birthday, I had no idea what that was. At all. I had to stop what I was doing and Google it and I still didn’t really understand! Basically, I learned that it is a Saturday morning cartoon about monsters who go to high school. Ok Got it.

In addition to my pretty epic costume that I created, I thought we needed some theme food. I spent some time on Pinterest and found an image that inspired to make these fantastically fun “monster” sandwiches!

They were a hit and the birthday girl, Lili, who can be quite the picky eater, was more than excited that she got to have ‘more than one!’ Everyone had a blast picking out which ‘monster’ they wanted to eat!

I made half the sandwiches on white bread and half on wheat bread and opted for classic combinations of Ham & Swiss and Turkey & Cheddar. I served mayonnaise and mustard on the side so everyone could dress them how they like.

So next time you have picky eater on your hands or an event with a theme, think about making your food more fun! It’s sure be a hit of ‘Monster Proportions!’

Savory Stuffed Brussel Sprouts

Stuffed brussel sprouts with parmesan and herbs on an appetizer plate

Baked to golden perfection, these delectable bites have the slight crunch of the Brussels sprouts and the creamy, cheesy filling, creating a palate-pleasing dish that’s both elegant and comforting.

How to make stuffed Brussel sprouts

Start by blanching, halving and then carefully hollowing out the center of a large Brussel sprout. Mix together a creamy stuffing of of ricotta cheese, grated parmesan, a variety of aromatic herbs and panko breadcrumbs. Bake until golden perfection and serve.

Stuffed brussel sprouts

I came across this gem of a recipe for stuffed Brussel Sprouts by Jerry James Stone who has an awesome vegetarian food blog. He takes incredible photos and produces killer “how -to” videos like the one below.

Stuffed Brussel sprouts can be time consuming to make at first, but they can be made in advance and are totally worth it. And like most things, the more you do it, the better you get at it. I have made them enough times that now I can bang them out pretty quickly, but it wasn’t always that way. You just have to get the hang of it but trust me- it’s worth it!

Stuffed-brussel-sprouts

This recipe combines the cored out pieces of Brussel sprouts with garlic, breadcrumbs, herbs, ricotta cheese, and parmesan cheese and then stuffs them back into the shells of the Brussel sprouts. The result is pure, bite sized deliciousness!

*This recipe is Gluten Free Adaptable

To make this appetizer gluten free, be sure to use Gluten Free breadcrumbs.

Stuffed Brussel Sprouts

Cored out Brussel sprouts are stuffed with a blend of garlic, breadcrumbs, herbs, ricotta cheese, and parmesan cheese then baked to golden perfection.

Ingredients

  • 15 Large Brussels sprouts
  • 1 cup whole milk ricotta
  • 1 cup Parmesan shredded
  • ½ cup panko bread crumbs
  • 3 cloves garlic minced
  • 1 tablespoon dried thyme
  • 1 tablespoon dried basil
  • 1 teaspoon dried marjoram
  • 1 teaspoon dried sage
  • 1 teaspoon kosher salt
  • pinch of pepper
  • Olive oil

Instructions

  • Preheat the oven to 400 degree F.
  • Wash the sprouts, trim the ends and halve them through the core. 
  • Fill a pot with water and bring it to a boil. Add the sprouts cut-side down. Cook for 1-2 minutes, remove them, separate them, and let them cool.
  • Core the sprouts. (Tip: Watch the video above for this next step. James teaches us how to quickly core the Brussels sprouts in just a few minutes.)
  • Finely chop the cored out Brussels sprouts pieces. Add the chopped sprout insides and 3 cloves of minced garlic to a sauce pan. Sauté over a medium-high heat. Cook until the chopped sprouts are tender and the mixture is aromatic. 
  • Mix the sprout & garlic mixture with the ricotta, Panko bread crumbs, parmesan cheese, thyme, basil, marjoram and dried sage. Add a dash of salt and taste the mixture. You want it to taste a bit overly salted because it will be less salty once they are baked.
  • Using a small spoon, fill the Brussels sprouts with the stuffing. Over fill them. 
  • Bake for about 20 minutes at 400 degrees or until the caps are crispy and slightly burnt.

Caesar Salad

caesar dressing

Homegrown and Homemade

Apparently, lettuce likes summer rain because I’ve had a bumper crop of lettuce this season and that’s about the only think I am loving about this wet season that we are having.

With so many leafy varieties doing so well in our garden this year, I’ve really had a chance to work on matching the different textures and flavors of the varietals with different meals, and finding the perfect dressings to accompany them. The delicate, silky nature of the butter lettuce and red oak varieties take well to simple dressings like a lemon vinaigrette. Anything more than a squeeze of fresh lemon, splash of olive oil, salt and pepper overpowers the delicate eaves.. When I match those varieties with a heavier meal, like chicken parmesan, I find the meal to be harmonious. On the other hand, the romaine is hearty and can stand up to a bolder flavor and a thicker texture- which is why it’s the preferred lettuce choice for a classic, tangy caesar dressing.

Caesar dressing is very, very popular. I am confident that it is the most common item on menus across the country, meaning that just about every restaurant has a version of caesar salad on it. Given it’s popularity, it amazes, and disappoints me, that nine out of ten times I order it, it’s really not impressive. Some places serve more of a vinaigrette version, while others are garlic forward and creamy, some with raw egg, others with cream. Personally, I like a tangy, creamy, salty caesar. I don’t see how it can be any other way.

Having never made homemade caesar dressing before, I really wasn’t sure where to start or how to select a good recipe. So I decided to make three versions, one of which contained no egg. I was hoping I was going to like it the no egg version but unfortunately it came in last in the taste test. You simply need the egg.

The winning recipe turned out to be Michael Chirarello’s recipe. Over time I have tweaked it slightly to create a version that we really enjoy.

The Recipe

Caesar Salad Dressing

Prep Time10 minutes
Course: condiment, Side Dish
Cuisine: American, Italian
Keyword: dressing

Ingredients

  • 1 large egg yolk- at room temperature
  • 1.5 tablespoons of dijon mustard
  • A dash of dry mustard if you have it.
  • 4 quality anchovy filets
  • 1 tsp minced garlic
  • 2 teaspoons fresh lemon juice
  • dash worcestershire sauce
  • 1 cup olive oil
  • 1/2 cup good quality parmesan cheese. I like a parmesan/romano mix

Instructions

  • Place the egg yolk, mustard, anchovies, garlic, vinegar, lemon juice, and a dash of Worcestershire sauce in a blender or food processor. Blend until pureed. With the motor running, add the olive oil in a slow stream. If the dressing stops moving in the blender, stop the machine, add the warm water and then continue until all the oil is added. To finish, add the cheese and pulse to incorporate. Taste and adjust your seasonings.
  • Toss with Romaine lettuce leave and croutons, if desired. 

[/vc_column_text][/vc_column][/vc_row]

Gorgeous Granola!

Homemade Granola Bars

Grab and Go Granola Bars

Granola bars are the perfect afternoon snack or breakfast on the go, and enjoyed by people of all ages. But the good ones can be quite expensive! Not only is this recipe better than any granola bar I ever purchased, but they go a long way and stay fresh for at least one week!

Since I discovered this delicious recipe I haven’t purchased a single granola bar from a store and I am confident that if you try this recipe,  you won’t be either. It seems like a lot of ingredients but once you have them on hand, they will be in your pantry and ready for your second and third batch, which you are certain to make. Like anything homemade, the end result is superior to anything store bought.

Feaster’s Tip:

Make sure to use a sharp, strong knife when you cut the Granola into bars.

Granola Bars

Prep Time15 minutes
Cook Time25 minutes
Total Time40 minutes
Course: Breakfast, Snack
Servings: 16 average size granola bars

Ingredients

  • 2 cups old-fashioned oatmeal
  • 1 cup sliced almonds
  • 1 cup shredded coconut loosely packed
  • 1/2 cup toasted wheat germ
  • 3 tablespoons unsalted butter
  • 2/3 cup honey
  • 1/4 cup light brown sugar lightly packed
  • 1 1/2 teaspoons pure vanilla extract
  • 1/4 teaspoon kosher salt
  • 1 cup rough chopped dried cranberries
  • 1/2 cup dried wild blueberries

Instructions

  • Preheat the oven to 350 degrees. Line a sheet pan with parchment paper.
  • Toss the oatmeal, almonds, and coconut together on a sheet pan and bake for 10 to 12 minutes, stirring occasionally, until lightly browned. Don’t burn it! Transfer the mixture to a large mixing bowl and stir in the wheat germ. Reduce oven temp to 300 degrees F.
  • Place the butter, honey, brown sugar, vanilla, and salt in a small saucepan and bring to a boil over medium heat. Cook and stir for a minute then pour over the toasted oatmeal mixture. Add the fruit and mix well.
  • Pour the mixture into the prepared pan. Dampen your fingers and lightly press the mixture evenly into the pan into the thickness and shape you want. (I like half inch deep.) Bake for 25 to 30 minutes, until light golden brown. Cool for at least 3 hours at room temperature before cutting into squares with a sharp, sharp knife. (I like to let it sit for about 5-6 hours.) Store in an airtight container with parchment in between the layers. Serve at room temperature. 

Notes

These stay fresh for at least a week in a good container, such as a glass pyrex dish with a cover.

Italian Stuffed Zucchini

Italian Style stuffed zucchini

Stuff your way to satisfied

Zucchini is an extremely versatile vegetable that grows easily and abundantly in the summer months. One of the many dishes you can make with this Italian squash is to stuff it. It makes for individual portions and you can get extremely creative with your stuffings.

This particular version of stuffed zucchini is inspired by classic baked stuffed shells. Rather than stuff the pasta shells with a ricotta mixture and topped with tomato sauce, I stuff zucchinis. The zucchini adds texture and introduces a vegetable element, both which  are typically absent from the original dish.  The flavors are reminiscent of a vegetable lasagna, but better. In addition to this dish tasting really good, there are actually quite a few other reasons I love this recipe.

  • It’s carb and gluten free
  • It’s super easy to make
  • It can be made in advance (always a fan)
  • It’s great to make for a party
  • It travels well
  • It’s inexpensive
  • Served as individual portions

Serve the Italian style stuffed zucchini along side a simple salad of mixed greens. Mmm, Mmm Good!

Feaster’s Tip

  • This is a great starter recipe for those just learning their way around the kitchen.
  • Pierce a few spots in the bottom of the zucchini to let excess liquid drain out so the inside isn’t soggy.

The Recipe

Ricotta Stuffed Zucchini

Stuffed zucchinis are an excellent party dish because they can be prepared in advance and baked right before serving. They stay hot for a long time and are easy to serve as individual portions.
Prep Time15 minutes
Cook Time30 minutes
Total Time45 minutes
Course: Main Course
Cuisine: Italian

Ingredients

  • 3 Zucchini
  • 2 cups Ricotta cheese
  • 1 Large egg
  • 1/3 cup Grated Parmesan cheese
  • 1 cup Frozen Spinach (drained & dried of all excess water)
  • Kosher salt & fresh ground pepper
  • Your favorite marinara sauce
  • shredded parmesan cheese for topping (optional)

Instructions

  • Pre-heat the oven to 375 degrees F.
  • Slice the zucchini in half longways. 
    Slicing a Zucchini lengthwise
  • Hollow them out into ‘zucchini boats.’ You want to leave about a 1/2 inch of flesh.
    Making Zucchini shells
  • Pierce the zucchini using a thin pairing knife to allow excess moisture to drain.
    Piercing a zucchini
  • Season with Salt & Pepper
    Seasoning zucchini with salt & pepper
  • Combine ricotta, egg, grated parmesan, spinach, pinch of salt & pepper and mix well. 
    cheese stuffing for zucchini
  • Stuff cheese mixture generously into the zucchini halves. 
    ricotta cheese in zucchini shells
  • Spoon marinara sauce over zucchini and bake for about 30 minutes or until you can piece the zucchini easily with a knife, but are firm enough to still hold their shape. Add cheese for the last few minutes of cooking. 
    stuffed zucchini in oven
  • Let zucchini rest for about 10 minutes and garnish with shredded parmesan, if using. 
    Zucchini stuffed with ricotta cheese

Notes

These can be prepared up to 24 in advance. To do so, stuff zucchini and store in refrigerator until ready to bake and serve. 

[/vc_column_text][/vc_column][/vc_row][vc_row][vc_column][/vc_column][/vc_row]

Slow Cooker Buffalo Chicken

Slow Cooker Buffalo Chicken

A two Ingredient recipe that will blow your mind & taste buds away!

Thats right, I said it- Two Ingredients is all you need to make Slow Cooker Buffalo Chicken. Simply combine chicken breasts and Frank’s hot sauce in the slow cooker and you are done! Okay, you need water too, but hopefully you have a running faucet and I don’t need to include that as an ingredient.

About slow cooker Buffalo Chicken.

When I first tested this recipe (many, many years ago), I thought there would be no way boneless, white meat chicken, cooked for hours, could be anything but dry and bland. Simply put, I was wrong! It came out juicy, satisfying, and without the toppings, completely guilt free. I don’t think it gets better than that. It’s low calorie, carb free (KETO) & gluten free, yet completely satisfying! It’s basically magic!

How to make Slow Cooker Buffalo Chicken

Are you ready for how easy this is? Simply add 3-4 boneless chicken breasts to a slow cooker, combine equal parts water and Frank’s hot sauce into a measuring cup. (About 1/2 cup of each but this amount can vary depending on how many or few chicken breasts you are making.) Pour the Hot Sauce and Water mixture over the Chicken Breasts until just covered. Turn your crockpot on low for about 6 hours until chicken falls apart easily with a fork. Drain, shred, top with extra hot sauce if desired and serve!

A Winning Game Day Recipe

Slow Cooker Buffalo Chicken is guaranteed WIN for game day gatherings. It’s easy, tasty, make-ahead & serves a crowd. Simply prepare the chicken and serve alongside slider buns with a store-bought or and easy and delicious Homemade Blue Cheese Dressing.

Blue Cheese Dressing
This homemade creamy blue cheese dressing is perfect over a salad, heirloom tomatoes, or for dipping wings, shrimp or veggies. You will never buy store bought again!

Pro Tips:

  • This recipe calls for classic hot sauce, NOT Tabasco or Sriracha.
  • You can double this recipe – just make enough hot sauce & water mixture to just cover the chicken. Do not over cover, just coat and barely cover the top of the chicken.

Serving Suggestions

  • Buffalo Chicken Sliders: For a party, serve this with potato slider buns, lettuce and blue cheese dressing and let everyone make their own sliders.
  • Buffalo Chicken Quesadillas: This shredded buffalo chicken makes an awesome filling for a quesadilla
  • Buffalo Chicken Burritos or Wraps: Stuff a Burrito with Spicy, healthy Buffalo chicken, lettuce, tomato and Blue Cheese or Cheddar Crumbles!
  • Lettuce Wraps & Salads: Keep it carb free and gluten free by serving the shredded buffalo chicken in a lettuce wrap or on a salad.
Slow Cooker Buffalo Chicken
Print Recipe
5 from 2 votes

Slow Cooker Buffalo Chicken

If you want a guaranteed WIN on game day, Slow Cooker Buffalo Chicken is it! It does not get any easier than this and you won’t believe the outcome.
Prep Time5 minutes
Cook Time6 hours
Course: Appetizer, finger food, game day, Main Course, party food
Cuisine: American
Keyword: buffalo, chicken, crock pot, easy appetizer, sliders

Ingredients

  • 4-6 boneless chicken breasts
  • 1/2 cup Frank’s Red Hot sauce
  • 1/2 cup water
  • Your favorite fixings like rolls, blue cheese & lettuce

Instructions

  • Place chicken in bowl of slow cooker. 
  • Combine hot sauce and water in a measuring cup and mix to combine. Pour over and toss with the chicken. 
  • The chicken should be submerged. If you need more continue to add equal parts hot sauce and water until chicken is just covered. 
  • Cover and cook in slow cooker for 4-6 hours on low until the meat easily shreds with a fork. 
  • Drain meat and shred chicken. (if you want it extra spicy, toss with more hot sauce or your favorite wings sauce at this stage. Be sure to add in small qualities and taste. Or serve on the side.)
  • Serve with slider buns, romaine lettuce (cut to size), blue cheese dressing, and whatever other toppings you like! (Cheese and chopped scallions are also great toppings!)

Notes

This recipe is scalable based on your crowd. 4 average sized boneless chicken breasts will make 10-12 sliders based on how much you fill them. 

Crockpot Sweet & Sour Meatballs

sweet and sour meatballs

The easiest app you’ll ever make!

I like to do things up a little ‘fancy’ in the kitchen, especially for a party. However, striking a balance between fresh, delicious homemade food, and managing to produce it all, can be challenging for the best of home cooks. So every good host needs a few semi- homemade tricks up their sleeve. This is one of them. It’s a true “Set it and Forget it” recipe.

sweet and sour meatballs
Perfect party food for kids and grown ups alike!

These marvelous morsels of meat have made an appearance at more of our gatherings and parties than I care to admit! The ingredients are certainly not fancy, but the result is delicious, and just what a host needs in their back pocket as an addition to any occasion, and for any age guest.

Next time you have a need to please a crowd, be sure to give this ‘easy as pie’ recipe a try. I can guarantee you someone will ask for the recipe!

Sweet & Sour Crockpot Meatballs

This is truly a ‘set it and forget it’ recipe!
Prep Time5 minutes
Cook Time2 hours
Total Time2 hours 5 minutes
Course: Appetizer
Cuisine: American

Ingredients

  • 2.5 lbs Frozen Cocktail Meatballs
  • 6 – 8 oz Heinz Chili Sauce
  • 6 – 8 oz Grape Jelly

Instructions

  • Mix the jelly and chili sauce in a bowl to combine it and break up the jelly a bit. 
  • Place meatballs in a crockpot.
  • Pour the mixture over the meatballs and stir to coat.
  • Place the crockpot on low for about 2 -2.5 hours or until heated through. Gently stir once or twice during cooking. 

[/vc_column_text][/vc_column_inner][/vc_row_inner][/vc_column][/vc_row]

Black Bean Brownies

Black Bean Brownies

Did you say Black Bean Brownies? Yes. I did.

Lets just face it together. Low cal and fat free foods are not as good as the ‘real’ thing. It’s sad, but true. Fat tastes good. This is a problem for me since my life motto is that every bite should be the best bite.  I rarely alter anything to make it low fat. Instead, I just cook with fresh, lean ingredients and avoid high fat food. (most of the time!) But these brownies are so good for something that are so modified, that even I can’t deny that this is a great way to treat yourself to a sweet treat and not feel the least bit guilty!

I have been making this recipe for a few years now and I always trick everyone! I love watching people’s faces when I tell them it’s a brownie made out of black beans! The consistency is more similar a cake style brownie than the fudgy type, but considering it’s made from egg whites and black beans, I can live with it. Trust me- you can too.

Black Bean Brownies

Course: Dessert
Cuisine: American
Servings: 8

Ingredients

  • 1 15 oz. can of organic black beans drained and rinsed
  • 1/2 cup agave syrup
  • 1/2 cup self rising flour *see Feaster’s note
  • 1/2 cup egg whites
  • 1/4 cup good quality unsweetened cocoa
  • 2 tablespoons good quality vanilla extract
  • 1 teaspoon baking powder
  • 6 tablespoons Nestle’s mini semi-sweet chocolate chips

Instructions

For Brownies

  • Preheat oven to 350 degrees. Spray a 8×8 baking dish with nonstick cooking spray. 
  • In a food processor, combine all the ingredients except the chocolate chips and process until smooth, occasionally scraping the sides of the processor. 
  • Stir in the chocolate chips with a spoon. Pour into the baking dish and bake for about 20 – 25 minutes or until a toothpick comes out of the center clean.
  • Cool completely and ice with cream cheese frostings or a light sprinkle of confectionary sugar. 

For Cream Cheese Frosting

  • Combine 4 oz cream cheese, a 1/2 tsp vanilla and 2 tablespoons confectionary sugar and process until smooth. Tweak to taste.

Notes

If you don’t have any self rising flour, just make your own. 1 cup all-purpose flour 1/2 teaspoon salt 1 1/5 teaspoons baking powder Stir or sift together the flour, salt and baking powder

A ‘Chopped’ Challenge

It was a cold December evening and my friends and I were sitting around celebrating the holidays when we had an idea. We wanted to host an in-house ‘Chopped Challenge.’ (If you don’t know what ‘Chopped’ is, it’s a Food Network show where competitors compete over 3 rounds of Appetizer, Entree and Dessert.) This seemed like a great idea until we sat down a few weeks later to figure out how the heck we could pull this off! We edited the rules a bit and decided there was only one way to find out- proceed as planned!

Well, the night was a huge success. Although, I have to admit, it was a lot of work! The competitors, myself included, were all exhausted! Everyone agreed it was all well worth it because we had a ton of fun and we all somehow managed to produce surprisingly impressive food out of some rather strange combinations of ingredients. I still don’t know how we all created edible entrees with peanut butter cups and lamb!

We had scoring sheets for each round and 3 judges were picked from a hat for each round. This kept it fair and kept everyone involved. What we found most surprising was how serious everyone took it! The competitors, the judges and the basket master were all fully committed to the challenge!

Now, I must admit that I may have had a tad more fun than the others because in the end, I did take home the win! But, the real win was having a night with old and new friends and looking around the room and seeing everyone talking and laughing and knowing the food brought us all together. After all, that’s what Feast & Merriment is all about.

So what were the secret ingredients for each round what did we make with them?

Appetizer Ingredients

Jalapeños
Egg Roll Wrappers
potato chips
Fresh Salmon

Chrissy: Roasted Jalapeño and salmon Macaroni and Cheese with potato chip topping in a Fried eggroll shell shaped into a bowl.
Noelle: Fried dumpling with salmon, corn, beans, jalapeños, potato chips with a tomatillo dipping sauce
Mike: Southwestern Eggroll with salmon, tomatoes, jalapeños, beans and potato chips with Velveta cheese

Entree Ingredients

Fresh English Peas
Butternut Squash
Peanut Butter cups
Loin Lamb chops

Chrissy: Pan seared lamb served over butternut squash pureed with marscapone cheese and peanut butter with a touch of chocolate and topped with sautéed peas, onions and parmesan cheese.
Noelle: Indian curry of Lamb, squash and peas served over a bed of rice with a peanut butter cup hot chocolate on the side
Mike: Burrito stuffed with rice, black beans, peas, tomatoes, onions and squash and lamb topped with a chocolate and cheese sauce

Dessert Ingredients

Passion Fruit
Rasberries
Beets
Chocolate Milk

Chrissy: Grilled Challah bread stuffed with melted Brie, chocolate and passion fruit jam with a raspberry drizzle accompanied by Beet and orange ice cream
Noelle: Beet and raspberry mousse served in a dessert shell with a chocolate milk shooter
Mike: Fried dough with fruit topping alongside a chocolate milk shooter